How to make Skrillex style growl basses with THE ONE-Series
July 16th 2015
- There are multiple techniques for creating a formant bass sound, in this tutorial we’ll focus on only two (one of them being very brief).
- Skrillex doesn’t only use this method as there are multiple approaches in creating a growl sound, it’s all about what sounds good, but this technique is used in many of his signature growl sounds yet it hasn’t been covered that well throughout the years, and many people envy his growls.
- BE AWARE that this is a very complicated form of sounddesign that demands a lot of time being spent on it and incorporates advanced sounddesign techniques.
- To understand this method as good as possible, it’s important that you’re aware of how formant shaped sounds works, how vocoding works, and that you have good understanding and habit of very precise frequency editing on Equalizers.
- As the software synth Massive by Native Instruments is very common in producing this kind of music, as well as since I’ve covered it in previous tutorials, I’ll use this synth as examples where suitable. However, the techniques can be implemented on many other software synths (or hardware).
On the modulator you control the movement of the formant using either an Envelope/ADSR, an LFO, or plain automation (recommended). The similar controls are added to the carrier, but they control the pitch if desired.

The modulator
The modulator consists of a formant movement, in other words vocaltype sound (a “yeayy” for example).
This formant sound can be achieved in a few different ways that I’ll point out:
- an FM bass patch. You could create a very basic growl using FM synthesis, and this is probably the most common technique among different musicians to make a growl sound.
But as we’ve mentioned before they don’t always sound that clean, and sometimes you want something dirty, but sometimes not.
However, if you only use the FM growl as a part of something bigger, then the concept of it changes a lot.
Create a very simple FM growl, one that doesn’t have too many extra features to make it dirty and dark – keep it clean and basic. Then instead of using it at a dark octave, pitch it up so it’s more towards the normal vowel-type sound, this will make it work better in a vocoded sound.
The advantages of using an FM growl as a vocoder modulator is that it’s evenly spread across the frequency spectrum and can save you a lot of time getting it full enough.
The disadvantage of this approach is that it’s not 100 % there if you want to sound like Skrillex, as you still get some of the dirty and beefy sound from the FM patch and don’t get that nice clean sound that you may want. This leads us to the next type of modulator.
- a bitcrushed sinesweep (high difficulty!). If you sweep a sinewave through the spectrum, add a bitcrusher plugin and reduce the samplerate, you’ll hear a steady formant sound that is very clean. Using this as the vocoder modulator is probably the best way as you get the closest to a clean growl sound. So all you have to do is automate the pitch of a sinewave and let it go through a bitcrusher plugin.
You then let it run through the bitcrusher with the reduced samplerate. You’ll find a Massive preset for this alternative approach in this soundbank for you to have a look at.
However, when using this method with a bitcrushed sinesweep or filtersweep you need to keep one thing in mind – it’s not as simple as it sounds. In fact, this is the most difficult and time demanding way to create this vocoder modulator.
Why is that? Well look on a spectrum analyzer of a vowel of this kind, and compare it with the FM bass, and you’ll see that the bitcrushed formant has way fewer frequencies, and they are not as tight.
And if you know your vocoders and understand how they work, you’ll realize that it could sound like some frequencies are “jumping” across the spectrum when you vocode the final sound, as the frequencies start to jump through the different vocoder-filters instead of sweeping naturally up or down – because there aren’t that many frequencies to begin with. This can muddy up the sound… a lot, not to mention that it can give annoying frequency spikes.
This means that you need to spend a lot of time editing the modulator frequencies before it reaches the vocoder so the frequencies run smoother.

Don’t be too harsh on the cuts of this kind – if you start to remove the bad spots completely other nasty spots will pop up as certain frequnecies disappear completely when they cross your notch cut, and you’ll find yourself in a never ending tiresome work of cutting notches and bringing back the body to the sound, only to open up another EQ and do everything a second time because the bad spots got brought up again with that warming EQ boost.
Start this technique first with the vocoder modulator by itself, and then continue editing when the vocoder is switched on to see how it responds.
- There are more ways than the two ones already mentioned, but I haven’t experimented with these, but I can imagine they can give good results as well.
Lastly, using a speech synthesizer and make it do growls could create interesting results.
Ok, so now we have talked about the modulators, but what carriers should you use?
Well it depends on what sound you want, but I usually choose between a few options:
- a static raw patch. There are multiple ways of creating a sound like this, but you could start off by creating some interesting timbres by stacking oscillators at different octaves, play with distortion, stack unison voices without detuning them, add some FM etc, to give a very dense, dark, full, and raw sound – or give a more dark and smooth sound, depends on what sound you want. The sky’s the limit!
- a reese bass. Using a dark reese bass can give a very sweet character to the final sound, especially if the reese bass behaves in a nasty way. This can give a more moving sound to the growl and a raw timbre.
- a dark supersaw. For a less haunting, and more moderate and solid sound, a lowpitched monophonic supersaw can do a great job. Make it sound as mean as possible!
There’s nothing wrong with trying out other patches than these three, you may discover a very powerful option for a vocoder carrier.
One thing that needs to be pointed out though, is that some vocoders can respond badly to detuned carriers. They may suddenly behave as if there’s some strange detuned-sounding chorus being applied to them.
And this is mostly not what a Skrillex growl is supposed to sound like, so be very gentle on any detuning in the carrier.
If it’s a reese bass that you use as the carrier, make it move slowly – and if it’s a dark supersaw… well… you might as well only use a dash of detuning so there’s only some kind of simple movement.
A thing I’d definately recommed is stacking multiple carrier synths as they will complement eachother and all contribute with their best parts to give a tremendous final carrier sound.
I tend to always use a dark and static raw patch as the main carrier, and then maybe blend in either a reese bass or a dark supersaw. And then I’ll EQ the carriers that has detuning on them so their detuning don’t affect the vocoded sound too much (do this when the vocoder is turned on).
But again… the sky’s the limit!
Before the vocoder…
Alright, now you may have decided on what modulator type and what carrier synth(s) we want, can we start dive into the vocoder? Not yet.
There’s some balancing that needs to be made before the vocoderstage.
You may turn on the vocoder, but wait a little bit with diving into your vocoder setup. Everything may sound very unbalanced, and you may think you just need to tweak this and that in the vocoder and it will be fixed… it’s not that simple.
Sure you can tweak the basic concept of the vocoder if you know what you’re going for, but don’t go any further, first you must sit down and go through the input sound.
This involves experimenting with what part of the frequency spectrum should come from the modulator/carrier.
For instance, if you’re going with a bitcrushed modulator, you’ll soon realise that the highend in the growl doesn’t sound that pleasant, and therefore it could be good to cut the highend down on an EQ on the modulator, and then either attenuate the highend on the carrier(s) more to compensate, or boost the highend after the vocoder when the carrier has been incorporated with the modulator.
Even though you may not always use the bitcrushed modulator, you should still go through what part of the sound should support the most where on the spectrum. A raw carrier sound can give the final growl the touch it needs with a boost in the highend + a cut on ther highend on the modulator and any additional carrier blended in.
A boost in the lower midrange on the carrier can also be good if the modulator makes the sound a little thin.
Another thing you should take a look at is compressing the modulator to make the shape bigger, as well as distorting it to make it more dense (especially if it’s a bitcrushed modulator).
Lastly, you may need to use some dynamic EQing or set a multiband compressor to control a narrow section of the spectrum, and even out any larger frequency spikes that you couldn’t tame with the EQ.

So now we have a modulator and a carrier to our liking, now we will combine them to create this massive growl sound.
Add a vocoder, preferably different ones and experiment and find the one you think sounds the best.
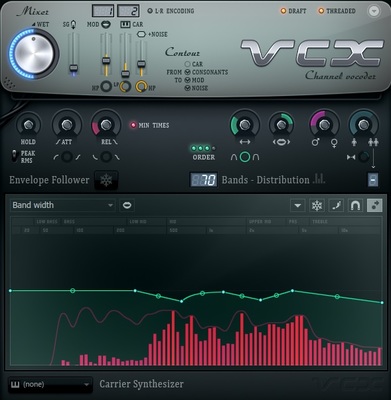
Now.. you have various tools inside the vocoder at your disposal, such as controlling the number of vocoder filters, as well as the width of the filters.
To my experience, a growl sound needs at least 50 vocoder filters applied, preferably up to 70 or even more as it gives better definition.
The filter width is a matter of taste, but for a true Skrillex growl sound I would say that the vocoder filters should only overlap a smudge if not at all.
Then a vocoder often comes with a formant pitch function, so you can make the final vocoded patch darker or brighter. But this is not the only formant pitch function in the whole sounddesign chain – you also edit the formant pitch of the modulator itself.
Since the pitch of the sound is defined by the carrier, what note you set the modulator to be played on doesn’t give any change in the pitch of the sound – but it makes the sound darker or brighter.
This means that you have two different formant pitch controls for your sound, and it gives a different sound if you keep the modulator dark and the vocoder bright, or if you keep the modulator bright and the vocoder dark. This gives you endless possibilities. But keep in mind that changing the note of the modulator can change what bad frequencies that are booming.
One good habit with the formant pitch parameters, especially the one in the vocoder, is the habit of automating this parameter.
This has to be done with care with only minor changes in the automation or it will sound unnatural (sometimes desirable but probably not in this case), but with this you can make every second of the growl sound as good as possible, as different stages of the growl sounds the best with different formant pitch settings.
Likewise can you automate other parameters, such as the vocoder filter width, to once again make the growl sound as good as possible at every stage.

The vocoder is not the end of the sound design chain – a lot happens after it, mostly to balance the growl sound as much as possible.
The first thing you should do once you’ve set up the vocoder is once again doing notches and similar.
Yes you may have 3-5 Equalizers taking care of this on the modulator mixerchannel, but there’s still a lot of EQing that needs to be done after the vocoder as well.
And the same rules apply – don’t go too harsh on the cuts, or you’ll find yourself in an everlasting loop of notching and bringing back the body only to restart the process.
Not only do you need to notch out bad spots, sometimes you may need to make drastic boostes or cuts to balance the growl so it doesn’t sound too thin or too harsh, especilly if you’re going with the bitcrushed modulator.
I once found myself doing a very wide boost of many decibels around 300-500 Hz, because it got so thin from all of the sounddesign stages that took place – but this really saved the sound!
Another vital thing is shaping the dynamics of the sound that comes out of the vocoder.
Even if you compressed the modulator by itself, you may still need to do this step once again on the output from the vocoder.
Likewise you may need to do some Dynamic EQing or narrow multiband compressing to tame any frequency spikes that you once again couldn’t handle with the EQs.
Moving on, one thing that is recommended that you do, is removing any subfrequencies from the sound that comes out of the vocoder, as it may sound unstable because of all of the things that takes place before and inside the vocoder. Instead, add a subsynth to reinforce the bass.
If you’re lucky, your audio software gives you the ability to either copy the progression of a certain automation, or you can link an extra parameter to an automation – that way you can quickly add the same pitch automation to the subsynth that you used for the carrier.
Did you know you can use Equalizers to boost the definition on the growl?
If you have a good understanding on how a formant sound is shaped, you’ll see the pattern on a frequency analyzer as the growl progresses.
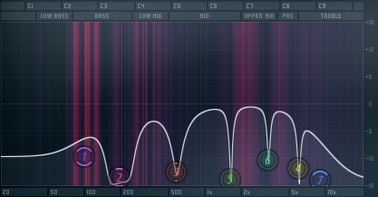
Then you can simply add two slightly more narrow peaks on an EQ, and automate their frequencies so they follow the movement in the frequency spectrum. Then all you have to is gently boost these two peaks and you should instantly hear more definition in the vowel. Automating the gain of these peaks can make this method sound more balanced.
Though sometimes it can feel as it simply gets “too much” with this technique applied – then it can be just enough by setting a small number of peaks on the EQ with the same width, and boost them when the formant sweep in the spectrum cross them.
I would say that you can use a higher boost with this technique than if you would let the peaks on the EQ follow the formant sweep across the spectrum.
Another thing that happens after the vocoder that is also very important, is automating the gain of the sound.
The reason why is that even though you have a carrier and a modulator incorporated in the vocoder, the carrier still contain a very differerent dynamic shape than the modulator. This can lead to the growl sounding poor because it’s like there are two different layers of it having their own wills… but we want a solid and tight sound.
A simple fix is to automate the volume after the vocoder, and shape it so it somehow follows the shape of the automation on the modulator – for instance, if the growl closes, you can cut the volume in the end, or if the growl modulation stutter, so should the gain – so the carrier follows the shape as well and doesn’t lie underneath in the background as some sort of rumble once the growl has ended.
Sometimes this method can sound too obvious, and then it would be good to go very gentle on it, and then also add an EQ where you automate the gain of a highshelf and let it close as well – this could give a more natural result if the first mentioned approach doesn’t work that well.
Don’t forget to automate the gain of any bass reinforcement as well, or the bass will jump out in an unnatural way.
Let’s not forget about the powerful tool of distortion shall we. Even the softest distortion can make the sound much more solid, without necessarily destroying it.
If you use a pre-tone and a post-tone EQ with this, you can make your own perfect distortion sound for the growl that really enhances the sound.
You could stop here, but if you’re like me… then you love Resampling. Record the the whole growl sound, and resample it the way you prefer.
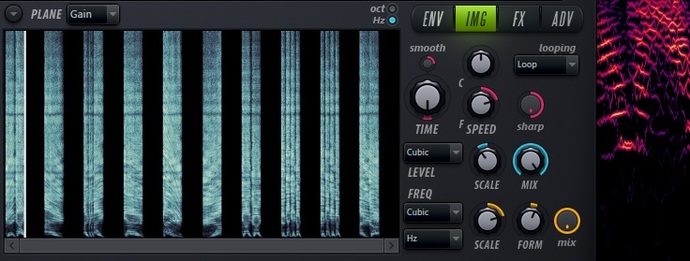
I like to resample in the software synth Harmor by Image-Line, and I always experiment with a 3rd stage of formant pitching (sometimes automation included) to make a final dark/bright balancing on the sound.
These are just two of infinite techniques that you can apply with resampling. I have stated it before, and here you have it again – the sky’s the limit! You could even take everything one step furter – by resampling the modulator and/or the carrier by themselves and process them to make them perfect before they hit the vocoder.
This is everything I have to share about Skrillex growls. Now go ahead and craft amazing growl sounds that will blow the mind of your audience!
I do also have some good news for you! Next week THE ONE-Series will release a free soundbank featuring 50 Skrillex growl loops using these techniques.
If you either feel these sounddesign methods are too complicated for you to apply in your songs, or if you simply seek inspiration on what sounds you could create with these techniques – then this free soundbank is a must have for you!
If you enjoyed this tutorial, don’t forget to follow THE ONE-Series on Facebook and/or Twitter, where we will from time to time hand out these insightful tutorials, and where you also can interact with us.
There’s a lot of work going on behind there tutorials, so we would appreciate it if you checked out us on Social Media and Beatport! Like this tutorial? Check out the entire sample and preset pack series from THE ONE-Series here. Download Free Bass Loops & NI Massive Preset Pack from THE ONE-Series here.